Search This Blog

Tuesday, October 26, 2010

Hell's Kitchen - Contestant Cooking Tips


Elsie Ramos
If the bottom of your pot or pan begins to burn, peel and cut an onion in half and place the cut side down deep into your dish so your food is not left with the burn smell.

Wendy Liu
Save the bones from store-bought rotisserie chicken for stock. You can make about two quarts of stock from one chicken.

Keep masking tape and a permanent marker in the kitchen to label leftovers with a brief description and date (CHX STOCK 10/6). You can also label items, such as spices, with the date they were opened.

When heating or re-heating items in the oven, line the sheet tray with loosely crumpled aluminum foil for a crispier bottom. The crumpled foil allows for better air circulation and drains off excess oil or juices.

Maribel Miller
When searing meat or fish, always make sure your pan is super hot!

Always allow your meat to rest before cutting it.

Polly Holladay
Make sure to smell asparagus before purchasing. The tops should be firm and have no odor.


When shopping, stick to the perimeter of the store where the bulk of "real food" is found.

Bonnie Appetit
Keep citrus fruit separate from other fruits. Citrus causes other fruits to ripen very quickly. But if you want to speed up the ripening process, throw an orange or lemon into your fruit bowl.

Need buttermilk? Add 1 tablespoon lemon juice to 1 cup of milk and let stand for 5 minutes. Stir it and voila!

Don't keep your tomatoes in the fridge! It ruins the flesh!

Brad Miller
Start with great fresh ingredients and the rest is simple.

Eddie Langley
Let your steaks and meat rest before cutting.

Julia Williams
Always check expiration dates.

Always use thermometers for chicken.

Melissa Firpo
When using corn starch as a thickening agent, always mix it with cold water, never hot water.

If you want a perfect hard-boiled egg with a bright yellow yolk, drop it in boiling water for exactly fourteen minutes. Any longer and you will have a gray or green yolk!

Rock Harper
Invest in a classic cast iron skillet. With the even distribution and holding of heat, they are the best metal to cook with. They're inexpensive too!

Sick of dry chicken? Brine it and be done with paper-like poultry forever. Brining is an awesome technique that is simple and so rewarding for many cuts of meat, especially those that tend to dry out easily. Trust me, brining will make you a star this holiday season.

Vincent Fama
Tomato sauce should not be cooked or prepared in aluminum pans. The tomato reacts with the metal and you get an acid taste. If this happens, add a head of celery to the sauce while you stew it and the celery will filter out the acid.

If you make a sauce, salsa, or remoulade that's too spicy, add white sugar in a small amount. This will numb the heat.

http://www.fox.com/hellskitchen/cookingtips/season-3

Wednesday, October 13, 2010

Chicken Pot Pie "well sort of"


With a busy day in store, I am thinking about how I will manage dinner. I will not be home until 6:45 and to start dinner at that time would be quite tiring. Not to mention, the family will be famished. Making dinner day after day can certainly become a challenge to anyone. I haven't been to the grocery store for a few days, and there isn't much in the house. So, I head to the refrigerator, freezer, and pantry for a quick inventory....frozen chicken breast, some veggies, crescent rolls,.......OK. Pot pie?? While not your traditional pot pie, this one turned out delicious. For you protein, use what you have on hand. Turkey, chicken, beef, or go for a meatless version. For vegetables, go with what is in the freezer. Do you have opened vegetables in the freezer? Do you have any cream of ANYTHING soup? Chicken, beef or vegetable broth or stock? No crescent rolls? How about biscuits? Or, one quick stop on your way home, you could just pick up a loaf of bread. Either way, a slow cooker can make most ingredients into a one pot wonder dinner!

Ingredients:

1- 1 1/2 pounds chicken, beef, turkey, or go meatless diced
2 cups or more of veggies (frozen peas, corn, carrots, beans, etc.)
1 cup of fresh veggies (diced potatoes, celery, and carrots)
1 onion diced
1 TBSP. of paprika
1 Tsp. of parsley
3 garlic cloves minced
2 can of cream of mushroom soup (or any "cream of")
1 cup of chicken stock or broth (or beef, vegetable). None available, use water.
1/2 cup grated parmesan cheese
salt and pepper to taste

Place all ingredients in a slow cooker and mix well. Cook on low for 6 hours. Serve with bread & grated parmesan cheese.

Cooking Tips


CHEF RAMSAY’S COOKING TIPS:

■Prepare for Success – Before you begin cooking a dish, have all your ingredients prepared and ready to use.
■Patience Is A Virtue – When cooking a steak, be patient and make sure the pan is sizzling hot before adding the meat. This ensures a perfectly seared meat.
■The Spice of Life – Always keep garlic ready to use in the freezer. Blitz a few cloves in the blender and freeze them in an ice cube tray. They’re perfect for use in sauces and stews.
■Don’t Be Wasteful – After cooking chicken, fish or beef, don’t toss the leftover bones – they are key to making perfectly flavored stock! Simmer the bones in water with a carrot, an onion, several peppercorns and a bay leaf for one to two hours.
■Keep It Hot, Hot, Hot! – Never open the oven when baking. The cold air will sink your cake.

http://www.facebook.com/?sk=messages&tid=1588695670259#!/notes/hells-kitchen/chef-gordon-ramsay-celebrates-the-milestone-100th-episode-of-hells-kitchen-by-sh/443463986477

Friday, October 8, 2010

French Onion Soup


I love french onions soup. Although, many restaurants have failed to impress with with their culinary preparation of what seems to be quite an easy dish to master. I have found amazing french onion soup at the Bistrot Zinc in Chicago, Zucco Le French Diner in New York City, and surprisingly Max and Erma's right here in Pittsburgh. No, I did not pursue a culinary journey to find the country's best french onion soup. I merely was the fortunate one to stumble across some of the best in my travels.
So, i decided, why not. Let's give it a whirl. But which recipe to try. I checked out Julia Childs recipe. Seemed pretty easy. Than I saw Emeril Lagasse. He uses Gruyere cheese. One of my favorites! So, Emeril's it is. I must say, his recipe did not disappoint. From the ease of the recipe, to the flavor, and lastly the much needed presentation. Yes, this was a winner. Yummo!

French onion soup is an onion and beef broth or a beef stock based soup traditionally served with croutons and cheese as toppings. Although ancient in origin, this dish underwent a resurgence of popularity in the 1960s in the United States due to an increased popularity for French cooking. Onion soups have been popular at least as far back as Roman times. They were, throughout history, seen as food for poor people, as onions were plentiful and easy to grow. The modern version of this soup originates in France in the 18th century, made from beef broth, and caramelized onions. It is often finished by being placed under a broiler in a ramekin traditionally with croutons and gruyère melted on top. The crouton on top is reminiscent of ancient soups (see History of Soup).
http://en.wikipedia.org/wiki/French_onion_soup

Ingredients:
4 tablespoons unsalted butter
3 pounds yellow onions, thinly sliced
1 1/2 teaspoons salt
1/2 teaspoon freshly ground black pepper
1/3 cup cognac
8 cups beef stock or broth
4 sprigs fresh thyme, tied into a bundle with kitchen string
1/2 loaf French bread, cut into 1/2-inch thick slices
1 pound Gruyere cheese, coarsely grated
1/2 cup Port wine (optional)
Finely chopped parsley, garnish

Directions:
In a Dutch oven or other large, heavy pot, melt the butter over medium-high heat. Add the onions, salt and pepper, and cook, stirring, until golden brown, 15 to 18 minutes. Remove the pan from the heat and carefully add the cognac. Return the pan to the heat and cook until the alcohol has evaporated. Be careful as the cognac may ignite.

Add the beef stock and thyme sprigs and bring to a boil. Reduce the heat to a simmer and cook the soup for 45 minutes.

While the soup is simmering, toast the bread slices until light golden brown. Remove from the oven.

Preheat the broiler.

When the soup is ready, divide 1/2 of the toasted bread slices between 6 individual ovenproof serving bowls or crocks and top with 1/2 of the grated cheese. Ladle some of the soup among the bowls and top with the remaining toasts. Ladle the remaining soup among the bowls and top with the remaining cheese. Place the bowls on a baking sheet and place under the broiler until the cheese is melted, golden brown and bubbly, about 5 minutes. Remove from the oven.

http://www.foodnetwork.com/recipes/emeril-lagasse/gratinee-lyonnaise-lyon-style-onion-soup-recipe/index.html

Garnish the top with chopped parsley and serve hot.

Thursday, October 7, 2010

Roasted Tomatoes


My father is a great gardener. He grows an abundance of vegetables. One of them is the versatile tomato. Which, in theory, is a fruit.

The tomato is a savory, typically red, edible fruit, as well as the plant (Solanum lycopersicum) which bears it. Originating in South America, the tomato was spread around the world following the Spanish colonization of the Americas, and its many varieties are now widely grown, often in greenhouses in cooler climates.
http://en.wikipedia.org/wiki/Tomato

Well, there were so many tomatoes this year, I made quarts and quarts of tomato sauce. I froze the sauce and will have many fuss free italian dinners this winter. Than, my dad gave my a bushel more. OK, I pondered, what will I do with these? Roasted tomatoes! Yes, I can freeze this well! If you’ve never made slow-roasted tomatoes before, prepare to have your mind blown with an amazing flavor!

Tomatoes sliced
4 tablespoons good olive oil
1 1/2 tablespoons balsamic vinegar
2 large garlic cloves, minced
2 teaspoons sugar
1 1/2 teaspoons kosher salt
1/2 teaspoon freshly ground black pepper
Directions
Preheat the oven to 450 degrees F.


Arrange the tomatoes on a sheet pan, cut sides up, in a single layer. Drizzle with olive oil and balsamic vinegar. Sprinkle the garlic, sugar, salt, and pepper over the tomatoes. Roast for 25 to 30 minutes, until the tomatoes are concentrated and beginning to caramelize. Serve at room temperature or cool and place in freezer bags for later enjoyment!

http://www.foodnetwork.com/recipes/ina-garten/roasted-tomatoes-recipe/index.html

Wednesday, September 22, 2010

Apple Cake


Apple season is upon us. This is the best time of year to pick and eat apples. I always love a great apple pie (see posting from 3/12/10), but I saw this recipe from Paula Deen, and had to try it. It was easy to make, moist, and scrumptious!!!!!

The Granny Smith apple gets its name from its founder, Mrs. Mary Ann (Granny) Smith. Granny Smith Apples are crisp, juicy, and tart which makes them perfect for either baking in pies, stewed in sauces or eating out of hand. They're also great in salads because once cut, they keep their color longer than other apples.

Usage: Very good for eating fresh, cooking & salads. They're also the primary ingredient for a Granny Smith Apple pie.

A Good-quality Granny Smith apple will be firm with smooth and clean skin. Granny Smith apples are a deep green with an occasional pink blush of the cheeks. Test the firmness of the apple by holding it in the palm of your hand. (Do not push with your thumb). It should feel solid and heavy, not soft and light. These apples may be less attractive, but the flesh is still good to eat after cutting.

Avoid product with soft or dark spots. Also if the apple skin wrinkles when you rub your thumb across it, the apple has probably been in cold storage too long or has not been kept cool. Grannies occasionally show "russeting," a brownish network at the stem end. http://www.produceoasis.com/Items_folder/Fruits/GSmith.html

Ingredients:

Honey Glaze:
1 cup confectioners' sugar
2 tablespoons honey
2 tablespoons milk

Apple Cake:
3 cups diced Granny Smith apples, about 2 apples
1 cup lightly toasted chopped walnuts
2 teaspoons vanilla extract
2 teaspoons ground cinnamon
3 cups all-purpose flour
1 teaspoon baking soda
1 teaspoon salt
2 cups sugar
1 1/4 cups vegetable oil
3 eggs
Directions
Glaze: Add all the ingredients to a small bowl and stir until smooth. Set the bowl aside.


Cake: Preheat the oven to 325 degrees F. Lightly grease a Bundt pan or tube pan.


In a bowl, mix together the apples, walnuts, vanilla, and cinnamon. In a separate bowl, sift together the flour, baking soda, and salt.


Using an electric mixer beat the sugar, oil, and eggs in a large bowl. Add in the dry ingredients and beat until completely combined. Fold in the apple mixture.


Scrape the batter into the prepared pan and bake for 1 hour and 30 minutes or until a tester inserted into the middle of the cake comes out clean.


Allow the cake to fully cool in the pan, about 1 hour, and then turn it out onto a plate.


Drizzle the apple cake with some of the honey glaze, serve and enjoy!

http://www.foodnetwork.com/recipes/paula-deen/uncle-bobs-fresh-apple-cake-recipe/index.html

Sunday, September 19, 2010

Hoagie Dip


As soon as Labor Day rolls around, football season arrives to take our minds off the bittersweet ebb of summer. Since half the fun of football is the pre-game tailgate, planning a quality tailgate is key for maximum game day enjoyment. One of my favorite ways to kick off early games is with a delicious spread of appetizers. If you are looking for an EASY, DELICIOUS, and PORTABLE appetizer for your tailgating, this one works well!!!!

Ingredients

1 medium onion (optional)
2 pickled pepperoncini peppers
1/2 head iceberg lettuce
1 large tomato, halved and seeded
1/4 pound deli-sliced genoa salami
1/4 pound deli-sliced ham
1/4 pound deli-sliced prosciutto
1/4 pound deli-sliced roast turkey
1/4 pound deli-sliced provolone cheese
1/2 cup mayonnaise
1 tablespoon extra-virgin olive oil
1 teaspoon dried oregano
1 1/2 teaspoons dried basil
1/4 teaspoon red pepper flakes
1 10-to-12-inch round or long loaf Italian bread
8 hoagie rolls, cut into pieces, for dipping

Directions
Chop the onion, pepperoncini, lettuce and tomato into bite-size pieces. Dice the meats and cheese.

Combine the chopped vegetables, meats and cheese in a large bowl. Add the mayonnaise, olive oil, oregano, basil and red pepper flakes and stir until everything is all mixed up and tasty. Refrigerate until ready to serve.

Carve out the center of the bread loaf to make a bowl (don't cut through the bottom) and cut the scraps into bite-size pieces. Serve the hoagie dip in the bread bowl, with the extra bread and hoagie rolls to scoop it up.

http://www.foodnetwork.com/recipes/mary-alices-hoagie-dip-recipe/index.html

Thursday, September 16, 2010

Chicken Noodle Soup


It's a windy and rainy today. A day you want to stay in your PJ's, wrap up in a blanket and read a great book. What goes better on a day like this than hot soup! Well, with all the talk on the news advising everyone to get their flu shots and a husband that started symptoms yesterday, I decided to make some hot & comfy chicken noodle soup.

Chicken soup is a soup made by bringing to a boil and then simmering chicken parts and/or bones in water, with various vegetables and flavorings. The classic chicken soup consists of a clear broth, often served with small pieces of chicken or vegetables, or with noodles or dumplings, or grains such as rice and barley. Chicken soup has also acquired the reputation of a folk remedy for colds and flus, and in many countries is considered a classic comfort foodhttp://en.wikipedia.org/wiki/Chicken_soup

Ingredients:

1 chicken (roasted), 3-4 pounds. Skin removed and meat shredded. A store bought rotisserie chicken would work just fine, or roast your own chicken. (See blog for recipe - 2/26/10).
4 cups chicken stock, home made or store bought.
"http://www.foodnetwork.com/recipes/alton-brown/chicken-stock-recipe/index.html" stock recipe
3/4 cup diced onion
3/4 cup diced celery
3/4 cup of sliced carrots
1 tablespoon minced garlic
4 ounces dried egg noodles
1 teaspoon finely chopped fresh thyme leaves
2 teaspoons finely chopped fresh parsley leaves
Also, I like to add the juice of one lemon. This is optional, but I love it!

Directions

In a large stockpot, heat a tablespoon of oil. Add the celery, carrots, garlic, and onions. Saute for 5 minutes. Add the chicken stock, thyme, parsley, and lemon juice if desired. Season with salt and pepper, to taste, and bring to a simmer over medium high heat. Simmer until the vegetables are almost tender, about 5 minutes.
Add the noodles and cook until tender, 5 to 8 minutes (depending upon the size of the noodles). Add the chicken, warm through, and then adjust the seasoning, if necessary, with salt and pepper. Serve with some Italian Bread. I prefer Pittsburgh's best! Mancini's!!!
http://mancinisbakery.com
Enjoy!

Monday, August 23, 2010

Cucumbers!!!!!!!!!!!!

1. Cucumbers contain most of the vitamins you need every day, just one cucumber contains Vitamin B1, Vitamin B2, Vitamin B3, Vitamin B5, Vitamin B6, Folic Acid, Vitamin C, Calcium, Iron, Magnesium, Phosphorus, Potassium and Zinc.

2. Feeling tired in the afternoon, put down the caffeinated soda and pick up a cucumber. Cucumbers are a good source of B Vitamins and Carbohydrates that can provide that quick pick-me-up that can last for hours.

3. Tired of your bathroom mirror fogging up after a shower? Try rubbing a cucumber slice along the mirror, it will eliminate the fog and provide a soothing, spa-like fragrance.

4. Are grubs and slugs ruining your planting beds? Place a few slices in a small pie tin and your garden will be free of pests all season long. The chemicals in the cucumber react with the aluminum to give off a scent undetectable to humans but drive garden pests crazy and make them flee the area.

5 Looking for a fast and easy way to remove cellulite before going out or to the pool? Try rubbing a slice or two of cucumbers along your problem area for a few minutes, the phytochemicals in the cucumber cause the collagen in your skin to tighten, firming up the outer layer and reducing the visibility of cellulite. Works great on wrinkles too!!!

6.. Want to avoid a hangover or terrible headache? Eat a few cucumber slices before going to bed and wake up refreshed and headache free. Cucumbers contain enough sugar, B vitamins and electrolytes to replenish essential nutrients the body lost, keeping everything in equilibrium, avoiding both a hangover and headache!!

7. Looking to fight off that afternoon or evening snacking binge? Cucumbers have been used for centuries and often used by European trappers, traders and explores for quick meals to thwart off starvation.

8. Have an important meeting or job interview and you realize that you don't have enough time to polish your shoes? Rub a freshly cut cucumber over the shoe, its chemicals will provide a quick and durable shine that not only looks great but also repels water.


9. Out of WD 40 and need to fix a squeaky hinge? Take a cucumber slice and rub it along the problematic hinge, and voila, the squeak is gone!

10. Stressed out and don't have time for massage, facial or visit to the spa? Cut up an entire cucumber and place it in a boiling pot of water, the chemicals and nutrients from the cucumber with react with the boiling water and be released in the steam, creating a soothing, relaxing aroma that has been shown the reduce stress in new mothers and college students during final exams.

11. Just finish a business lunch and realize you don't have gum or mints? Take a slice of cucumber and press it to the roof of your mouth with your tongue for 30 seconds to eliminate bad breath, the phytochemcials will kill the bacteria in your mouth responsible for causing bad breath.

12. Looking for a 'green' way to clean your faucets, sinks or stainless steel? Take a slice of cucumber and rub it on the surface you want to clean, not only will it remove years of tarnish and bring back the shine, but is won't leave streaks and won't harm you fingers or fingernails while you clean.


13. Using a pen and made a mistake? Take the outside of the cucumber and slowly use it to erase the pen writing, also works great on crayons and markers that the kids have used to decorate the walls!!


Sent to me via e-mail from Mom and Aunt Shirley. Thanks!

Wednesday, August 18, 2010

Dried Hot Peppers


I love spicy food. I use hot sauce and hot peppers in many things I eat! I am fortunate enough to have a father who grows plenty of hot peppers. I grew some on the deck, but they are no where near as impressive as his. With plenty of hot peppers, I like to stuff them with hot sausage or pickle them for a great topping on pizza and salads. Another great idea is drying your peppers.

If you grow or buy hot peppers in quantity, drying them is a great way to store them long term for use in recipes all year long. After all, you don't want to waste any. Peppers have lots of health benefits - and so do most other vegetables.

Dried hot peppers are great to keep on hand for cooking your favorite spicy recipes. When stored properly, hot peppers will stay fresh and delicious for many months. Proper storage is the key to maintaining high-quality peppers and the foundation for delicious tasting recipes.

For lasting freshness, store dried chili peppers in airtight containers or storage bags
away from heat and light. Dried peppers should be leathery to brittle in consistency. Discard all containers of dried peppers that are questionable.

Use dried hot peppers the same as you would in recipes calling for hot peppers, but keep in mind that dried peppers aren’t as sizable as fresh peppers. One half cup of dried peppers equals approximately one cup of fresh ones. Reconstitute the peppers and grind them when necessary. When using them in hot dishes containing a lot of liquid such as soups and stews, it isn’t necessary to reconstitute them first. Just drop them in when the liquid begins to boil, and turn the temperature down so they can simmer until the food is thoroughly cooked and the peppers are tender and hydrated. Also crumbled on pizza is delicious!!!!!!!

Dehydrator method:

Take your dehydrator to a well-ventilated area. The fumes from very hot peppers will make your eyes water, and since this process can take several days, you'll want to make sure that the location is closed off and well ventilated. Outdoors would be even better, if possible.
Let the peppers sit in the dehydrator for several days at about 100 degrees Fahrenheit, checking to see how they're progressing. The peppers must be very dry before they're done, as any moisture left over will invite mold .

Oven:

Put the peppers in the oven and heat to 100 to 135 degrees Fahrenheit. Leave the oven door open a bit to provide air circulation.
If you're using baking sheets, turn the peppers frequently to provide even drying.
Allow the peppers to dry well, with no discernible moisture left over.
Whole peppers will take about 6 hours, sliced peppers about 3 1/2 hours. Check frequently!

Air dry:

If you want to learn how to dry peppers in the air, leave the peppers whole, and leave the stems attached.
Using a long, sharp needle and strong thread or fishing line, string the peppers together. Leave enough room for the air to circulate between each pepper.
Hang your stringed peppers in a warm, dry place, preferably in direct sunlight.
Peppers may take a few weeks to dry completely. If you want the pepper seed intact, this is the method you'll need to use when drying hot peppers.

Friday, August 6, 2010

Roasted Cauliflower with Parmesan and Pancetta


This is a yummy side dish. My daughter loves it and wants me to make it all just for her.

Ingredients

1 head cauliflower, cut into pieces (about 6 cups)
4 ounce piece pancetta, diced
1/4 cup butter
1/4 cup all-purpose flour
1 1/2 cups milk
1 clove garlic, whole
1 teaspoon red pepper flakes
1 cup grated Parmesan
1/4 teaspoon salt
1/4 teaspoon freshly ground black pepper
1/8 teaspoon freshly grated nutmeg
1/3 cup bread crumbs
Directions
Preheat the oven to 350 degrees F.

Bring a large pot of salted water to a boil over high heat. Blanch the cauliflower for 2 minutes. Transfer the cauliflower to a buttered 9 by 13-inch baking dish and let cool, about 5 minutes.

In a small skillet over medium-high heat, brown the pancetta. Transfer to a small bowl and set aside.

In the same skillet, melt the butter. Add the flour and stir until combined. Continue stirring for 2 minutes to cook the flour. Slowly add the milk, stirring continuously until the milk has incorporated and there are no lumps. Add the garlic clove and red pepper flakes and stir the sauce over low heat until the mixture coats the back of a wooden spoon. Add the Parmesan, salt, pepper, nutmeg, and the reserved pancetta. Stir to combine. Pour the sauce over the cauliflower to cover. Top with a sprinkling of bread crumbs.

Bake until the breadcrumbs are golden and the cauliflower is cooked, about 25 minutes. Serve immediately.

Recipe courtesy of Giada De Laurentiis

Tuesday, June 8, 2010

Cucumber Dill Salad


Looking for a refreshing side for your cook out. This one is light and simple. Hope you like it!

2 English cucumbers (thinly sliced or shredded, your choice)
1 small red onion (diced)
1 1/2 tablespoons salt
1 tablespoon plus 1 teaspoon white wine vinegar
1 teaspoon sugar
2 teaspoons dried dill or 2 tablespoons fresh

Directions

In a colander, toss the cucumber and onion with the salt and let it sit and drain for 20 minutes. Press the liquid out of the vegetables and rinse well with cold water.

In a medium bowl combine the vinegar and sugar and stir well. Add the cucumber mixture and toss to coat. Stir in the dill.

Thursday, June 3, 2010

Salsa and While Wheat Chips


Yum Salsa! Everyone has their favorites! With so much cilantro growing on my back deck, I felt inspired to make some! (And the pix was taken yesterday, but I keep forgetting to reset my date on the camera, it always defaults to 1/13/2007 when I change the batteries! Argh) I like to make my own chips as well. This salsa can be made mild or super spicy like I like it. To make yours mild, just avoid the hot habanero! Also, do not include the seeds in the jalapeno and banana pepper. I used a can tomato because the fresh tomatoes just do not taste juicy and sweet this time of year.

Salsa

Ingredients:

1 can of diced tomatoes
1 vidalia onion chopped
1 green pepper chopped
1 banana pepper chopped, seed included
1 jalapeno pepper chopped, seeds included
1 habanero pepper chopped, seeds included
1 can of diced chilies, including juice
1 handful of fresh cilantro chopped
1 juice of a line
1 Tbsp. of sea salt
2 garlic cloves, chopped

Enjoy!

Chips

1 package of whole wheat tortillas cut in to triangles
2 Tbsp. olive oil
1 Tbsp. sea salt

Heat oven to 375. In a large bowl, place the tortillas. Drizzle olive oil and sea salt. Toss gently to be sure each tortilla is lightly covered. Place the tortillas in a single layer on a baking sheet. Bake for 6 minutes or until crisp. Stay close, they can burn easy. Repeat until all tortillas are cooked. Once cooled, place in an air tight bag.

Wednesday, June 2, 2010

BBQ Ribs


Barbecuing is a very popular American summer tradition with studies showing that as much as 90% of all Americans attend at least one barbecue party every summer. Most American families own some type of the grill or the other, depending on their own special needs and space or budget constraints. I love to grill out all year round. However, I do not own a smoker...YET! I only have a gas grill which is great to finish the ribs, but the ribs must be pre-cooked to ensure tenderness. I like to use a dry rub, place them in a bag, and allow to sit over night. Then, I use a slow cooker, on low for 8 hours. I finish the ribs off with sauce on the grill. I like Sweet Baby Ray's original barbecue sauce if I am using a bottle from the store. However, I do like to make my own as well.

Sauce:

2 cups ketchup
1 cup water
1/2 cup apple cider vinegar
5 tablespoons light brown sugar
5 tablespoons sugar
1 tablespoon lemon juice
1 tablespoon Worcestershire sauce
1/2 tablespoon fresh ground black pepper
1/2 tablespoon onion powder
1/2 tablespoon ground mustard

In a medium saucepan, combine all ingredients. Bring mixture to a boil, reduce heat to simmer. Cooked uncovered, stirring frequently, for 1 hour 15 minutes.

Dry Rub:

1 1/2 cups paprika
3/4 cup sugar
3 3/4 tablespoons onion powder

Rinse and dry ribs. Place on a clean cutting board and pull off the membrane, the thin fatty skin that lines the underside of the ribs. Trim the ribs of excess fat and meat. Liberally season both sides of the ribs with 1/4 to 1/2 cup Dry Rub. Wrap ribs and refrigerate for at least 8 hours so flavors can permeate.

You can store any unused in an air tight container for 6 months.

Dry rub and sauce recipe courtesy of the Neely's.

Place the ribs in a slow cooker. Add a Tbsp. of liquid smoke.Cook on low for 8 hours or 4on high. Ribs should be fork tender. When cooked,brush the BBQ sauce on the ribs. Place ribs, meatier side down, on the grill, on medium high. Cook, with grill open, for 5-6 minutes each side. Remove from grill. Add additional BBQ sauce if desired.

Dry rub and sauce recipe courtesy of the Neely's.

Tuesday, June 1, 2010

Beer Can Chicken!


I have heard from many people how wonderful beer can chicken is. I decided to give it a try, After a search of various websites, I found one that I could make in the oven and seemed really easy. Let me tell you, it was AMAZING! This had to be the moistest chicken I have ever eaten! Yummy!!!

Recipe courtesy Guy Fieri, 2007

Ingredients:
1 (2 to 3-pound) whole chicken
1 teaspoon dried oregano
1 teaspoon garlic powder
1 tablespoon onion powder
1 teaspoon paprika
1 teaspoon ground ginger
1 teaspoon dried sage
1 teaspoon sea salt
1 tablespoon freshly ground black pepper
2 cloves garlic, smashed
1 (12-ounce) can beer
1/2 pound bacon

Directions

Preheat oven to 450 degrees F. Wash chicken with cold water and pat dry with paper towels.

Mix dry ingredients in small bowl. Rub 1/2 of the ingredients on inside cavity of chicken. Gently peel skin away from chicken and rub mixture into meat of chicken. Open beer can pour out about 1/2 cup. Drop the garlic cloves into the beer can. Place chicken, open end down, over the beer can to insert the beer into the cavity. Place chicken, standing up, in large saute pan. Place 1/3 of the bacon in the top cavity of the chicken and drape the remaining 2/3 of the bacon down the outside of the chicken. Pierce the bacon to the chicken with toothpicks.

Place chicken in the oven for 10 minutes and then lower temperature to 325 degrees F and cook for another 1 hour, or until the internal temperature in the thickest part of the thigh reaches 165 degrees F on an instant-read thermometer.

Sunday, May 30, 2010

Dill Potato Salad


I hope everyone is enjoying their holiday weekend. The kickoff to summer! Summer to me is spending time with friends and family, camping, swimming, and of course cook outs!!!! My herbs and vegetable plants are abundant on my deck. The aroma of the sweet basil, fresh dill, and rosemary fills the air! I am anxious to begin to make many dishes with these fabulous fresh herbs. I am waiting anxiously for the first buds to appear on my tomato and pepper plants!
With the onset of cookout and grilling season, I will begin with sharing a fabulous recipe for potato salad. Every time I bring this dish to a picnic I receive rave reviews and many request for the recipe. I hope you will like this as well!!

2 pounds of idaho potatoes, peeled, quartered
6 eggs hard boiled
2 tablespoons freshly chopped fresh dill
2 tablespoons chopped fresh chives
1 cup mayonnaise
2 tablespoons fresh lemon juice
Coarse salt and freshly ground black pepper

Directions
Place your potatoes in a large saucepan filled with cold salted water and cook on medium heat until tender for about 20 minutes. In a sauce pan place you eggs. Bring water to a boil, turn off heat and cover for 15 minutes. When cool, peel and slice the eggs.

Drain potatoes, transfer to large bowl and set aside to cool for a bit. When the potatoes are cooled slightly add the eggs, dill, chives, & mayonnaise. Drizzle with lemon juice and toss gently to coat. Season with salt and pepper, to taste.

Tuesday, May 11, 2010

Ricotta Chicken Pasta w/Broccolli


My daughter is a great cook. She attends Parkway where she studies the culinary arts. She is always saying how much she loves ricotta cheese. Now, I didn't think I did. My husband is very firm on his opinion on meat only ravioli. And the site of ricotta cheese and cottage cheese makes him queasy. So, when I decided to try and incorporate ricotta cheese into a recipe I had to hide the container. HAHAHA! Well, he liked this. Now, he did not LOVE it, as he likes beef in pasta. But, this was received well by the children! This recipe is a modified version of a pasta dish that is from Rachel Ray's 30 Minutes Meals. (A great cookbook given to me by my good friend Kellie B.)

Ingredients:

1 pounds whole wheat rigatoni
2 bundles of broccoli, cut into florets
2 Tbsp. of olive oil
1 pound of chicken breast
5 cloves of garlic, minced
2 cups ricotta cheese
1/4 cup grated parmesan cheese
1 Tsp. thyme
1/2 Tsp. nutmeg

Please read through all the directions before starting. It will make this much easier!

Cook the pasta el dente in heavily salted water. Reserve 1 cup of the water from pot and drain. While pasta is cooking, bring a large pot of water to a boil. Cook the broccoli for 4 minutes and shock immediately in a bowl of ice water to stop the cooking process. Cut the chicken breast into 1 inch pieces. Heat a large pan with the olive oil and cook the chicken and garlic for about 6 minutes, or until chicken is cooked the entire way through. To the pan, add the broccoli, pasta, ricotta, parmesan cheese, and the reserved cooking water. Add the thyme and nutmeg. Salt and pepper to taste. Toss until creamy. Enjoy!

Thursday, May 6, 2010

Apple Pork Chops


My husband loves applesauce with his pork chop. So I came up with an easy recipe that gives him this taste. It was a hit with the kids too! Hope you enjoy!

4 pork chops
1 Tbsp. flour
1/2 sliced onion
1 cup apple juice
1 apple peeled and diced
1 Tbsp. butter

Season flour with salt and pepper. Lightly flour pork chops. Add 1 Tbsp. of butter to a skillet on medium and melt. Brown pork chop on both sides. Stir in onion, apple juice, and apple. Bring to a boil. Simmer for 7-8 minutes.

Thursday, April 22, 2010

Go Green Sammies! Rachel Ray


4 Servings

Prep 20 min (plus marinating)

Ingredients:
2 tablespoons extra-virgin olive oil (EVOO)
1/3 cup chopped cilantro
2 scallions, finely chopped
2 tablespoons chopped fresh thyme
Grated peel of 1 lime plus juice of 2 limes
2 teaspoons hot pepper sauce
Salt and pepper
Four skinless, boneless chicken breasts
4 deli slices pepper jack cheese
2 avocados
1 small red onion, finely chopped
1 small plum tomato, seeded and finely chopped
2 jalapeño chiles, seeded and finely chopped
1 large clove garlic, grated or finely chopped
Juice of 1 lemon
4 hamburger buns or crusty rolls, split and toasted
1 head bibb lettuce or green leaf lettuce
Tortilla chips, for serving
Directions:
1.In a shallow dish, combine the EVOO, cilantro, scallions, thyme, lime peel, half of the lime juice, and the hot sauce; season with salt and pepper. Add the chicken and let marinate for at least 30 minutes.

2.Preheat a grill or grill pan to medium-high. Grill the chicken until cooked through, 12 minutes. Just before the cooking time is up, top each breast with a slice of pepper jack cheese.

3.In a medium bowl, mash together the avocados, red onion, tomato, jalapeños, garlic, lemon juice and remaining lime juice; season with salt.

4.Top each bun bottom with lettuce, a chicken breast, a mound of guacamole and a bun top. Serve with the tortilla chips.

Friday, April 16, 2010

Cheeseburger in Paradise


Nothing beats a delicious cheeseburger. Except one topped with an over easy fried egg! OK, if you have had this, you know exactly what I am talking about. If not, you have to try this! I experienced this for the first time a couple of years ago at a restaurant called Fat Burger. Yes, Fat Burger. They have the oddest things to put on a burger. I saw the egg, and was not impressed. However, my husband had ordered it. One bite and I was hooked! Yummo!

Ingredients:

1 pound of ground beef
1 Tsp. onion powder
1 Tsp. of garlic powder
1 Tsp. of mustard
2 Tbsp. of steak sauce or worcestershire sauce
1 Tsp. of steak seasoning

Fold the seasoning into the beef until it is mixed well.

Divide the beef into 4 equal sections. Using your thumb, create an indentation in the middle of each patty. This helps the patties keep their shape on the grill.
Cook the patties over high heat. You can cook them over a grill or a barbeque. Close the lid, and grill for 5 to 10 minutes. Keep a close eye on them. Hamburger meat contains a lot of fat which can cause flare-ups and burned burgers. Flip the patties only once and let them to cook another 5 minutes, or until they've reached a desired doneness. Add cheese during the last minute if desired. Remove the patties and turn the heat to low. Toast the hamburger buns for 30 seconds. Add your favorite toppings. Pictured, a over easy egg, onion, pickle, tomato, lettuce, and mayonnaise.

Monday, April 12, 2010

Chicken Nuggets


What kid doesn't like chicken nuggets. OK, I admit it. I LOVE chicken nuggets. But the so called "all white meat chicken" found at many restaurants is a mystery. When you bite into the nugget you are often disappointed. Do you wonder where this mystery meat really came from?! It is usually warm, bite-size, and sort of white. Did you know that depending on the price, water can be a replacement for chicken to make the nugget cheaper and soybean is also often used as a chicken substitute! Well, I like to make my own nuggets. They ARE made with ALL white meat. They are juicy and MUCH healthier than these mystery nuggets.

Ingredients:
1 pound of chicken breast, cut into 1" pieces
3 eggs (or egg beaters), whisked
salt and pepper
1/4 cup of canola oil

Breading
1 cup of Italian bread crumbs
1/4 cup of grated Parmesan cheese
OR
1 cup of plain bread crumbs
1 package of dry hidden valley ranch seasoning packet

Directions:
Dip each piece of chicken in the egg than in the breading. Allow to rest for 5 minutes. This will help the breading to "set" so it does not come off during the browning process. In a large frying pan, heat the oil over medium heat. Brown the chicken on all sides and place on a baking sheet. Bake the nuggets at 350 for 12 minutes. Once removed from oven, salt and pepper to taste while still hot. Serve with your favorite dipping sauce.

A Funky Find for Your Kitchen


I first saw this odd item on The Rachel Ray show. It was on a segment of "Stump the Rach". With the 20th season of Survivor pitting the show's greatest heroes against its villains, Rachael is excited to see her friend Colby back in the challenge. Rachael loves to challenge Jeff when he comes on our show, so for his fifth visit(making him our most-frequent guest!) Rachael invites him to play her favorite game -"Stump the Rach!"

It's never wise to put all your eggs in one basket. But a silicone pod is another thing entirely.

One glance at the alien-like foodpod from fusionbrands and you'll know you've got something new and different on your hands. It's fanciful. It's futuristic. But most of all, it's functional.

The nonstick silicone cooking container can corral a dozen eggs, several heads of broccoli or pounds of shrimp for boiling, blanching or steaming. Once the food is cooked, remove the pod from the water using the handle and let drain.

Because the pod's flexible, it'll fit in any size pot and fold up for easy storage. And the handle has a clip that attaches to the side of the pan, making it easy to grab when needed.

Ladies and gentlemen, the foodpod has landed.

Add the foodpod to your kitchen by visiting www.fusionbrands.com.

http://newsletter.cookingclub.com/newsletter/newsletter.aspx?top=133282%20

Pot Roast with Mashed Potatoes


What could be more of a comfort food than Pot Roast and Mashed Potatoes?!! Yum.

The term "pot roast" can be used to describe either the cut of beef or the cooking method. A pot roast is usually browned then covered and braised with vegetables in some liquid. After cooking, the remaining liquid is often thickened or cooked down to make a gravy or sauce, and the meat might be served with potatoes or sliced and served over noodles. Pot roasts can be cooked on the stove top, in a crock pot or in the oven.

Ingredients:

2 pound chuck roast
1 Tbsp. kosher salt
1 Tbsp. of pepper
1 Tsp. of garlic powder
2 Tbsp. of canola oil
1/2 pounds of baby carrots
2 small onions, sliced
1 can of beef broth
3 Tbsp. of flour

In a dutch oven, heat oil on medium. In a small bowl mix the salt, pepper, and garlic powder. Rub the mixture on the roast. Brown the roast on both side in the dutch oven. Once brown, remove. Add the carrots, onions, and beef broth. Return the roast back to the dutch oven. Cook at 325 for 3 1/2 hours. Remove the roast and vegetables. Place the dutch oven on stove top over medium heat. Add flour to thicken sauce. Cook until thick. Add more water if needed.

Ingredients:

2 pounds russet potatoes, peeled and cut into large chunks
1 1/2 teaspoons kosher salt, plus more as needed
4 cloves peeled garlic, smashed
1/4 cup unsalted butter
3/4 cup whole milk
Freshly ground black pepper

In a large saucepan, combine the potatoes, 2 teaspoons salt, garlic and enough cold water to cover. Bring to a boil over high heat. Lower the heat to maintain a simmer and cook until fork tender, about 15 to 20 minutes. Drain the potatoes and garlic leaving just enough water in the pan to cover the bottom. Return the potatoes and garlic to the pan. Add the butter and mash until melted. In the microwave, heat the milk until just hot, but not boiling. Stir into the potatoes and season with salt and pepper, to taste. Serve immediately.

Super-Cool Heart-Shaped Tomatoes


Some people wear their hearts on their sleeves.

You prefer a more low-key approach, showing your love through your cooking. And now you've found a cute and creative way to help get your message across.

Using the Snap 'n Shape, you've grown a garden full of tiny heart-shaped tomatoes, ready to be tossed into salads, hidden in lunches or sliced and used as a romantic pizza garnish.

These small, hollow, heart-shaped molds clip onto the stems of young fruiting cherry tomato or other small-vegetable plants, like cherry peppers. As the vegetables grow, they take on the form of the molds. When you're done with one batch, you can move the reusable molds to new plants.

Each order comes with 10 Snap n' Shapes and a bonus packet of cherry tomato seeds.

Let love grow.

Order the Snap 'n Shape online at www.snapnshape.com.

Courtesy of FOOD NOW!

Saturday, April 10, 2010

The New Cancer-Fighting Superfoods

Having trouble eating your five to nine servings of fruit and veggies a day? This may motivate you: If we all got our daily dose, there could be 200,000 fewer deaths from cancer every year. Fortunately, you aren't limited to a lifetime of broccoli. These six fruits and veggies offer just as much powerful protection for your breasts and the rest of your body—and they'll help fight diet boredom too.

Artichokes

A study in the British Journal of Nutrition showed that artichokes had the highest antioxidant capacity of 40 vegetables and herbs tested. "Like broccoli, cabbage, and cauliflower, artichokes are rich in flavonoids, which help slow the growth of breast and other types of cancer cells in lab studies.

Pomegranates

High in polyphenols and vitamin C (both antioxidants), this fruit helps fight breast cancer. "Dozens of lab and animal studies show that pomegranates may halt the spread and recurrence of the disease.

Bok Choy

This type of Chinese cabbage is milder then green cabbage or kale, but like those veggies, it's packed with isothiocyanates. "These sulfur compounds help your body convert some of the estrogen it make into a weaker form, which helps protect your breasts," says Karen Collins, P.D., a nutrition adviser for the American Institute for Cancer Research. Don't overcook bok choy; that reduces its anticancer properties.

Tomatoes

Lycopene, a strong antioxidant, is what gives tomatoes their red color. "It plays a major role in helping cells communicate, mainly by rallying healthy ones to band together and kill a "sick" cell that could become cancerous," says Steven Pratt, M.D., the author of SuperHealth. But keep in mind that your body better absorbs lycopene from foods when they're cooked and served with a little bit of fat.

Swiss Chard

"Swap Swiss chard for spinach and you'll get similar amounts of important antioxidants-like vitamin C, bet-carotene, and lutein-which fight cell damage and strengthen your immune system," says Shin. But this dark, leafy green is less bland, so you get a flavorful boost when you add it to pasta dishes, soups, and stir-fries.

Purple Grapes

"Resveratrol, which is found in red and purple grape skins, is a plant estrogen, and getting enough of it can lower your breast cancer risk because it blocks the effects of the stronger estrogen your body makes," says Pratt. It also boosts immunity and fights cell-damaging free radicals.

Information provided by www.shape.com

Friday, April 9, 2010

Tuna Noodle Casserole


One of the childhood dishes I remember is tuna noodle casserole. I think every child in Rural Valley had to have grown up with this dish. It is healthy (for the most part) and very cheap to make. What could be less expensive and full of protein than a can of tuna! I varied the dish a little by adding pimientos and some parmesan cheese. Simply delicious!!

Ingredients
1 can (10 3/4 oz.) Campbell's® Condensed Cream of Mushroom Soup
1/2 C. milk
2 Tbs. chopped pimientos
1 C. frozen peas
2 cans tuna, drained
1/4 cup shredded parmesan cheese
2 C. medium egg noodles, cooked and drained
2 Tbs. dry bread crumbs
1 Tbs. butter, melted

Directions

Stir the soup, milk, pimientos, peas, tuna, cheese, and noodles in a 1 1/2-quart casserole. Stir the bread crumbs and butter in a small bowl. Bake the tuna mixture at 375°F. for 25 minutes or until hot and bubbling. Stir the tuna mixture. Mix the bread crumbs and butter. Sprinkle the bread crumb mixture on top of the casserole. Bake for 5 minutes or until the bread crumb mixture is golden brown.

Thursday, April 8, 2010

Thai Chicken


Once a week, I try to introduce new flavors into our family menu. These new offerings to the family are not always received with great enthusiasm. However, this one seem to strike a home run. Everyone loved it and asked for seconds. This recipe can be varied in spice depending how hot you like it.

Thai cooking is based on a fusion of strong flavours. The five flavours of Thai cooking are spicy (pet), sour (brio), salty (kem), sweet (waan) and bitter (kom). These flavors are combined to produce dishes of startling intensity that burst onto the taste buds. Thai dishes are generally eaten with rice or noodles to disperse the intensity of the flavours.

Ingredients
2 lb. chicken legs or chicken thighs
1/3 C. green onions, minced
4 cloves garlic, minced
3 Tbs. hoisin sauce
2 Tbs. peanut butter
1 Tbs. fresh ginger, minced
1 Tbs. soy sauce
1 Tbs. sesame oil
1 Tbs. fresh lemon juice
1 tsp. hot pepper sauce
2 Tbs. fresh coriander, chopped

Directions

In a bowl combine; green onions, garlic, hoisin, peanut butter, ginger, soy, sesame oil, lemon juice and hot pepper sauce. Arrange chicken legs in an oven proof dish. Spoon sauce over the chicken. Bake in 375 degree degrees oven for 45-50 minutes or until golden brown and cooked. Sprinkle with the chopped coriander. Serve with rice.

courtsey of recipe4living.com

Tuesday, April 6, 2010

Spring Clean Your Body


Spring has arrived along with Spring Fever. The desire to clean your house and your body. Months of covering up in sweatshirts is over....reality sinks in when you attempt to put on your favorite shorts. So, I have been heading to the gym. I feel more energized and it is great reconnecting with my old workout friends. When I arrived home, I was doing some cleaning so I put on The Doctors. I occasionally will pick up some very helpful information when I actually listen. Well today's episode caught my ear. I had to sit down and listen.

Top Ten Spring Foods

What you put on your plate can help or harm your internal organs. The Doctors and Liz Vaccariello, editor-in-chief of Prevention, showcase the wonder foods that can improve your body from the inside out.

1. Dandelion
Dandelions have been used for centuries to treat liver problems. The weed is rich in vitamins A, C and K, as well as beta-carotene and antioxidants. Taking a dandelion supplement can help improve production of bile in the liver.

2. Ginger
Ginger root, a diuretic, helps the kidneys flush toxins from the body.

3. Blueberries
Blueberries are the ultimate brain food. The tiny fruit packs a big punch with the highest concentration of antioxidants per serving among fruits. They also helps boost neuron signals in the brain.

4. Salmon
Omega-3 fatty acids, the unsaturated fats found in salmon and other fatty fish, help reduce the risk of heart disease. The American Heart Association recommends that people eat fish rich in omega-3 fatty acids at least twice a week.

5. Avocado
Avocados are high in vitamins C, B6, E, K, as well as potassium and copper, all of which work wonders for the skin. The fruit helps restore hair’s luster as well. See how to make your own avocado hair mask!

6. Spinach
Spinach is high in the carotenoid lutein, a natural antioxidant that can help protect the eyes from cataracts, macular degeneration and other diseases.

7. Broccoli
Broccoli helps condition hair. The vegetable is high in vitamins A and C, which the body needs to produce sebum, an oily substance secreted by hair follicles to keep it healthy and shiny.

8. Flax Seeds
Flax seeds are an excellent source of omega-3 fatty acids and protein, which help build muscles.

9. Jalapeños
Jalapeños contain capsaicin, an active component of chili peppers that has potent antibacterial properties. Capsaicin stimulates secretions that clear mucus from your nose, which relieves nasal congestion and helps fight and prevent sinusitis, or chronic sinus infections. See the sinus buster in action!

10. Celery
Celery is one of the best foods for teeth. The amount of chewing required to break down the crunchy vegetable increases the production of saliva, which helps destroy bacteria that cause plaque.

11. Sunshine
Sunshine is not a food, but it is the best source of vitamin D, which is produced in the body in response to sunlight. Without vitamin D, our bodies cannot properly absorb calcium, and our bones become weak and brittle.

Monday, April 5, 2010

Mexican Pasta


This meal is sure to satisfy even your most finicky appetites. If you love tacos, this is your meal with a healthier twist. I use whole wheat pasta instead of taco shells. I also used a roast for the meat, but you could certainly use hamburger or chicken! For the meat, I use whichever roast is on sale that day. For this particular recipe, I used a sirloin tip roast. They were BOGO so I couldn't pass it up!

Ingredients:

Meat Sauce
3 pound roast
2 cans of fire roasted tomatoes (14.5 ounces)
1 small onion, diced
4 gloves of garlic, chopped
1 can of chilies
1 bottle of beer (corona works well) & 1 cup of beef stock or 2 cups of beef stock
2 Tbsp. of canola oil
2 Tbsp. chili powder
2 Tbsp. of coriander
2 Tbsp. of cumin
1 Tbsp. of cracked black pepper

1 package of pasta (whole wheat penne used here)

Allow your roast to come to room temperature. About 20 minutes. In a small bowl, combine the chili powder, coriander, cumin, and black pepper. Mix and rub on all side of the roast. In a dutch over, place 2 Tbsp. of canola oil. Heat on medium high for 2 minutes. Brown the roast on both sides. Set roast aside. Add the tomatoes, garlic, beer & stock, onions, and chillies. Mix well. Return roast to the dutch oven. Liquid should cover the roast entirely. If it does not, add beef stock to just covering. Place the roast, covered, in a 325 oven for approximately 3 hours. When done, shred the meat with two forks. If meat does not tear apart easily, place back in the over for an additional 35 minutes. Keep the roast in the dutch oven as you shred because the juice will absorb with the beef. The shredding process takes a little while, be patient. It is worth it. Once you shed the meat, place the lid back on the dutch oven to keep the sauce warm.

Boil your pasta in heavily salted water according to the packages direction. For whole wheat, about 11 minutes. Drain and return to pan. Ladle in about 1/2 of the sauce and mix.

To serve, add additional sauce on top and add your favorite taco toppings! Lettuce, tomatoes, onions, cheddar cheese, sour cream, taco sauce, and jalapenos.

Sunday, April 4, 2010

Spring Cleaning Your Pantry~


The temperature is warming up. Spring is in the air. Time for outdoor walks, cook-outs, and inevitably ~ Spring Cleaning. Here are some helpful tips on cleaning your pantry. These tips courtesy of Good House Keeping Magazine.

Know what you have, when to use it, and when to toss it~

Good for 6 months
Baking Soda
Baking Powder
Brown Rice and should be kept in an air tight container. This one surprised me.
Nuts
Oil, unopened!. Once open, use within 3 months or store in the refrigerator for up to 6 months.
Peanut Butter

Good for 1 year
Flour and should be stored in an air tight container. Whole wheat flower is good for only 6 months.
Grains

Good for more than a year
Canned goods (discard if can has leaks, rust, or large dents)
Dried beans
Honey
Sugar, white. Brown sugar should be used within 6 months
Vinegar, unopened. Once opened plan to use within 6 months.

Tuesday, March 30, 2010

Sunday Dinner Mishap


Sunday is one of the few days of the week we as a family can sit down and have dinner together. Most Sundays involve an Italian Dish. I begin my sauce early in the morning. My whole house smells like marinara sauce. I keep a loaf of Mancini's bread close by so everyone can have a taste of the sauce throughout the day. Most of my dishes are the traditional type. Spaghetti and meatballs, ravioli, chicken parmesan, and lasagna. Well, I decided to try something new. This was inspired by one of my favorite food network stars. I won't mention his name, because this recipe did not work. His Italian version added blanched cauliflower and spinach to the dish. OK, spinach sounded ok....cauliflower? But it looked so good. So, my sauce had turned out amazing. I blanched my cauliflower and browned it as directed my chef. I added the pasta, sauce, cauliflower, and spinach to the dish reluctantly, but still optimistic. I called for everyone to come to the table. As everyone arrived, my son Travis's first comment was "Oh no, not more green stuff"! Let me explain, he will practically jump over the counter to stop me from adding my garnishes of parsley, basil, or cilantro. Then my husband asked "What is in here?" - referring to the cauliflower. I told him what it was. My oldest son chimed, "Whatever happened to normal spaghetti?". Well, everyone ate their food, but not with the usual gusto as with "normal" spaghetti. I will say, this will be one dish not repeated at our dinner table.

One thing I would like to add. My husband asked "What are the health benefits of cauliflower? I will feel better eating it if I knew." WELL ~ Cauliflower Nutrition Highlights:

Cauliflower is a good source of Vitamin C and folate, a B-vitamins (B1, B2, B3, B6, B12) essential to healthy cell-development. Further, it is a good source of lutein, which may assist in eye-health. It also contains phytostols, a group of compounds recently determined to play a role in cancer-prevention. It contains 2.5 grams of fiber per 100 grams (roughly 1 cup).

Monday, March 29, 2010

Future Chefs of the Vallies Family

Oh, the amazing children of our family. All full of spirit, personality, and promise. The future of our family lies in their hands. As parents, we can guide them, set an example, and hope that they make great choices.
It is no surprise that many of these young minds love to cook. Will one of them be the next Julia Childs, Rachel Ray, Emeril Lagasse, or Wolfgang Puck? My son Ryan, and Chet and Mindy's daughters Emma and Marley (pictured) have very outgoing personalities. These three were born to entertain. They maybe one of the next great food network star!


Sunday, March 28, 2010

Mindy's Slow Cooker Cheesy Veggie Rice


I am always trying to find ways to get my youngest to eat his veggies! I am not sure if anyone else has this problem, but this will solve it. What kid doesn't love cheese. And with the veggies mixed in, he/she will just have to go for it. This is filled with healthy veggies and is a sure crowd pleaser. And with the added bonus of utilizing your slow cooker, this is definitely a winner! Recipe and photo courtesy of my cousin Mindy. Thanks!

Ingredients

2 cups white rice
3 1/2 cups of water
26 oz (large can) cream of mushroom soup
1 cup milk
1/2 c sour cream
2 cups diced velveeta cheese
6 slices deli american cheese
2 cups broccoli/cauliflower chopped
1/2 cup shredded cheddar
1/2 cup shredded mozzarella

Mix well.

In crock pot combine all ingredients and cook 6-8 hours on low. Stirring once 1/2 way through.

Friday, March 26, 2010

Slow Cooker Spare Ribs


Ingredients:

4 pounds of country-style spare ribs
2 Tbsp. of canola oil
2 onions sliced
2 Tbsp. of dried ancho chilies, chopped
1/2 tsp. cinnamon
1/4 tsp. ground cloves
1 can of crushed tomatoes
2 garlic cloves, minced
1/2 cup of orange juice
1/3 cup white wine
1/3 cup of brown sugar
1 tsp. of orange zest
2 Tbsp. of apple cider vinegar

If not already done, cut ribs into individual riblets. Heat oil on medium and brown ribs on both sides. Remove ribs and set aside. To the same pan, add onions, chilies, cinnamon, and gloves. Cook until soft, about 5 minutes.
In slow cooker add tomatoes, juice, wine, sugar, and orange peel. Mix well. Add ribs; stir to coat. Cover and cook on low for 5 hours. Remove ribs to a plate. Let sauce stand 5 minutes. Skim off excess fat and discard. Stir in vinegar. Serve sauce over ribs.

Thursday, March 25, 2010

Nana and Pam's Salsa

I am always looking to my family of great cooks for their recipes. This one was given to me by my Godmother Janet and my Cousin Pam. I provided the exact recipe given to me and a picture of them having a great time in the kitchen making it. Isn't it so true how so many memories can be made in the kitchen and around the dinner table. Ole'

Beef Stroganoff Casserole


Ingredients:

1 pound of ground beef
8 ounce can of mushrooms
1 large onion, diced
3 gloves of garlic, minced
1/4 cup beef stock or dry white wine
1 small can of cream of mushroom
1/4 cup shredded Romano cheese
1/2 cup of sour cream
1 Tbsp. Dijon mustard
4 cups cooks egg noodles
1 tbsp. Italian seasoning
1/4 tsp. salt
1/8 tsp pepper
1/4 cup bread crumbs

Place the beef in a large skillet and add salt, pepper, and Italian seasoning. Brown the beef. Drain and set aside. Heat oil in same skillet over medium high heat. Add onions, mushrooms, and garlic until tender. Add the beef stock and reduce heat. Simmer 3 minutes. Remove from the heat; stir in the soup,cheese, sour cream, and mustard. Add the beef. Mix well. Place noodles in a baking dish that is sprayed with non-stick spray. Pour the beef mixture over the noodles and mix well. Sprinkle top with bread crumbs. Bake 350 for 30 minutes.

Wednesday, March 24, 2010

Stuffed Banana Peppers


This recipe is inspired by my Dad. Let me tell you about his garden. My Dad grows a variety of vegetables in the summer. When you arrive at my parents' house, you can't miss his beautiful garden. It is filled with zucchini, a variety of peppers, tomatoes, etc. I love to harvest an abundance of banana peppers. This usually happen right before the pre-season for the Steelers! I prepare at least 12 dozen of stuffed peppers and I freeze them. Uncooked. This provides me a great supply to last me through the football season and well into winter. When I have guest over for the big game, I simply go to my freezer, pull out how many I need, place them in a pan with some sauce (marinara or my Dad's awesome hot pepper sauce), and bake. And presto, my guests think I have been slaving all day!

Ingredients:
12 banana peppers
3 pounds of hot sausage
3 eggs
1 1/2 cups of romano cheese, shredded
1 cup of italian bread crumbs
2 cups of marinara sauce (For when you bake them)

Clean the peppers. You will want to wear gloves as the peppers will linger on your hands, even after you wash them. Cut the top off the peppers, cut the pepper lengthwise on one side with a paring knife leaving about 1/2" not cut at the bottom.
In a large bowl, mix the remaining ingredients, except the marinara sauce. Stuff the mixture into the peppers. At this point you can place them into freezer bags. To bake, place in a baking pan with the marinara sauce at 350 until sausage is cooked completely. (Approximately 45 minutes if thawed, 90 minutes if frozen). Garnish with shredded romano, fresh parsley, and a dollop of sour cream.

Kicked Up Tuna Melt


I have always loved a tuna melt. I have tried multiple times to perfect one, but usually the tuna salad I put on the melt was either too "wet" from adding too much mayo or tasteless. I have tried many versions, but the one that I like the best is buy Emeril Lagasse. This one is not mine, but it is amazing and there is no reason to alter this. If you like capers (which I LOVE) you will like this one!

Ingredients

4 (6-ounce) cans solid white tuna packed in water, drained
1/2 cup kalamata or other brine-cured black olives, pitted and minced
1/4 cup plus 1 tablespoon mayonnaise, plus more for spreading
1/4 cup finely chopped red onion
1 tablespoon plus 1 teaspoon capers, drained
1 tablespoon plus 1 teaspoon freshly ground black pepper
1 tablespoon fresh lemon juice
1/2 teaspoon salt
4 slices rustic white bread, or other dense white bread
2 medium tomatoes, sliced, or 8 tomato slices
4 ounces provolone cheese, thinly sliced
Directions
Preheat the broiler and position the oven rack about 6 inches from the broiler.

Combine the tuna, olives, mayonnaise, red onion, capers, black pepper, lemon juice, and salt in a medium bowl. Stir until well mixed.

Arrange the bread slices on a work surface. Lightly spread each slice of bread with additional mayonnaise and top with 2 tomato slices each. Divide the tuna salad evenly among the 4 bread slices over the tomatoes. Top the tuna salad with slices of provolone.

Place sandwiches on a sheet tray and place under broiler. Cook until cheese is golden and bubbly, about 5 minutes.

Monday, March 22, 2010

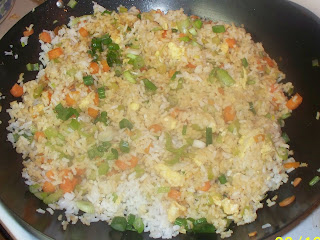
Vegetable Fried Rice


So, break out the wok! Yes, the piece of cookware that is so under appreciated! This recipe is simple and delicious. You can also make it more hearty by adding cooked shrimp, chicken, or pork!

Ingredients:

4 eggs, whisked
3 scallions, chopped
4 carrots, diced
4 stalks of celery, diced
1 Tbsp. fresh ginger, minced
1 Tbsp. garlic, minced
4 cups of cooked rice
6 Tbsp. soy sauce
1 1/2 Tbsp. rice wine vinegar
3 Tbsp. canola oil

Heat your wok with 2 Tbsp. canola oil. Add your whisked eggs and cook,set aside when done. Add 1 Tbsp. of oil to wok. Add the scallions, garlic, carrots, celery and ginger. Place lid on the wok and allow to saute until the vegetables are tender. Add the cooked rice, egg, soy sauce, and rice wine vinegar. Mix ingredients together with a wooden spoon. Cover and allow to cook for an additional 3-5 minutes. Serve with scallions and additional soy sauce.

Friday, March 12, 2010

Cinnamon Crumb Apple Pie


There are so many versions of apple pie out there. I would have to say I like almost all of them. Here is one that is always a hit. I have to admit, I use store bought pie crust. I have made my own, but find it easier and less messy to buy store bought!

Ingredients for filling:

ready made pie crust (2)
5 granny smith apples, peeled and diced
3/4 cup of sugar
1 tsp. cinnamon
8 ounce chunky applesauce
1 tbsp. lemon juice
2 tbsp. of butter

Crumb Topping

3 Tbsp. flour
1 Tbsp of sugar
1 tsp. of cinnamon
1 Tbsp room temp butter

Preheat over to 425. Please 1 pie crust into a pie plate. Bake for 8 minutes. This will keep your bottom from being soft. (you may need to poke whole in the crust after 4 minutes) Remove from oven. Reduce heat to 350. In a large bowl mix together your dry ingredients for filling. Next mix in the applesauce & apples. Pour in to pie pan. Drizzle with lemon juice and dot the top with butter. Place second pie crust over top of filling. Crimp together with a fork. Also poke several holes on top crust with fork to release steam during baking. Mix the crumb topping together and sprinkle over crust. Bake an additional 45 minutes.